Getting Started
There are lots of different equipment configurations with which you can do RSpec spectroscopy. Below are some suggestions. We haven’t tried them all, but these are the kinds of approaches we’ve seen in use.
Are you new to spectroscopy? An RSpec user, Iain Petrie, has written a very valuable, two-part introduction to the field. Read his posts from the bottom of each page to the top for chronological order. Set one: link. Set two: link.
Have questions? Fill in our contact form (link) to have our Help Desk experts email you. We specialize in getting newcomers up and going.
Also, see the short video here to see information about the free webinars that Field Tested Systems offers. These webinars are great for a club meeting. They are a complete introduction to the fundamentals of spectroscopy, the equipment needed and the kinds of scientific results you can expect.
Here’s what you need to get started in the field of telescope spectroscopy:
1. RSpec software: you can download a free, fully-enabled 30-day trial version of RSpec from this link. If your trial period runs out, just send us an email. We’re happy to provide you with an extension. You can also purchase a copy of the software in our store: link. Even without clear skies or a diffraction grating, you can get started today with the trial version and a sample spectrum you can download by right-clicking and saving the file at this link. This is a .png file, but RSpec handles FITS files too!
Also, see link for sample files and a YouTube video of a workshop Tom gave on processing.
2. Diffraction Grating: We recommend the Star Analyser 100. It comes mounted in a standard 1.25” filter cell which screws into your CCD imaging camera, your telescope’s filter wheel, or the nose piece of your video camera, or your DSLR. With 100 lines/mm, the Star Analyser 100 was specially designed amateur spectroscopy. Details: link.
Note that to capture star spectra requires that you already be somewhat proficient at capturing images of astronomical objects. You will need to be able to find specific astronomical objects. And you will need to be able to capture images of them that are properly exposed, well-focused, and not smeared from movement. We’re happy to coach you on how to get started if you need to acquire these skills.
Cameras
RSpec can process real-time video, or FITs, JPGs, BMPs, TIFs, RAW images from any source including DSLRs and your current astronomical CCD.
Video Cameras: RSpec can process static images or real-time video. If you want to do real-time video, you’ll need a DirectX-capable video camera.
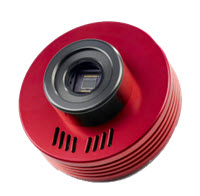
For inexpensive video, we recommend cameras from ZWO: the color ZWO ASI120MC-S ($159, link) or mono ZWO ASI120MM-S. ($199, link) or ASI178 ($278, link). Mono cameras are more sensitive. Color cameras can introduce artifacts but are usable and better for outreach and education.
Confirm your setup in our calculator: link. In most cases, you just screw your diffraction grating into the nose of these cameras, and you’re ready to go! The Celestron Neximage Burst Color camera ($199, link) also works right out of the box with our Star Analyser grating. (Sensor distance is 44mm.)
Other cameras: For a bit more sensitivity and general performance, see the ZWO ASI190MC ($299) and ASI190MM ($399). RSpec can also show live video spectra from Imaging Source cameras, Mallincams, Orion All-in-One cameras (using their Live Broadcast/WDM drivers), and the QHY5-II series and QHY5-III series of cameras.
Have a DSLR? For video with a Canon camera, see Canon’s ESO Webcam utility: link. For other cameras, see www.sparkosoft.com to use RSpec with a live DirectX feed from your DSLR.
Mono or color? If you’re doing public outreach or teaching with RSpec, we recommend a color video camera so that the RSpec video preview of the spectrum is the more interesting and intuitive rainbow rather than just black and white. Mono cameras can produce more detailed spectra and are more sensitive, but a grey smudge is a lot less engaging to newcomers than a colorful, rainbow spectrum.
If you already have an astronomical video camera that you use with your telescope, if it can accommodate a 1.25″ filter cell for the diffraction grating then you probably have all you need. To get the best spectra, the grating should be located at the optimal distance from the CCD chip – see our calculator (link) and read about spacers at this link.
Note: Beware of the Orion Starshoot Solar System Camera. This camera’s driver turns off the screen if not enough pixels are illuminated. This is a good design when imaging bright, large solar system objects. However, on the sparse, dim star fields we see when capturing spectra, this camera’s driver turns off the camera, preventing you from capturing spectra data.

Using your DSLR as a live video camera: The Canon 450d and other DSLRs can generate live video. With many cameras, the addition of an inexpensive software or hardware DSLR-to-webcam converter (to DirectX/DirectShow) as described above lets you feed real-time video from your camera into RSpec. This configuration can get remarkably good results and is extremely simple to set up.
Still Cameras: Although real-time spectroscopy using live video is easier and considerably more exciting, a standard astronomical FITS camera will allow you to capture dimmer objects.
 Do you have an astronomical FITS camera already? RSpec will read and process FITS images from any camera. Looking to upgrade your camera or buy a new one?
With many cameras, you simply thread our 1.25″ Star Analyser 100 grating into the nose piece threads of the camera. If you’re using a filter wheel, you can use our Star Analyser 200 grating. For more information on gratings, see this link.
In addition to astronomical FITS camera images, RSpec can process raw, jpg, bmp, png images from, for example, a DSLR. You can configure RSpec to automatically load each new image file as your camera saves them to a specific folder on your hard disk. We offer special adapters ($38) to mount a grating on your DSLR: link.
Computer: RSpec runs on almost any Windows computer (1+ gigs of RAM, XP through Windows 10). For larger format cameras or live video, you’ll need a computer with a bit more processing power than the low-end, low-power mobile Celeron-type chips. RSpec handles FITS, jpg, bmp, png, and raw images straight out of the box. For video cameras, the camera needs to produce DirectX video output. Most of the popular astronomical video cameras (like Mallincam, NexImage, ZWO, etc.) come with DirectX drivers. For other cameras, ask your vendor about DirectX capability.
We’re always happy to answer any questions you may have. Please forgive us for suggesting one last time: Ask us questions! Use our live chat form to talk to us directly: link. Or, you can use our contact form (link). Don’t be shy — we love answering questions!
Also, our online forum is a great source of information from a helpful community of experienced users: link.